Projects
Recording the first project begins your work with the construction journal. In the Projects module, among other things, clients and their access to the application are recorded.
It combines the following agendas:
- Overview of projects
- Invoices
- Documents
- Clients
During use, the project record is supplemented with individual records, invoices and especially photos.
Overview of projects
Recording of basic data about the project, GPS coordinates for the needs of targeting attendance and capturing subsequent statistics about the project.
Attention: Fill in the project information carefully. They are the data source for exporting the dailyconstruction log.
Tip: If you are starting to work with the application and want to acquire records for several of your projects, then process them with a bulk import.
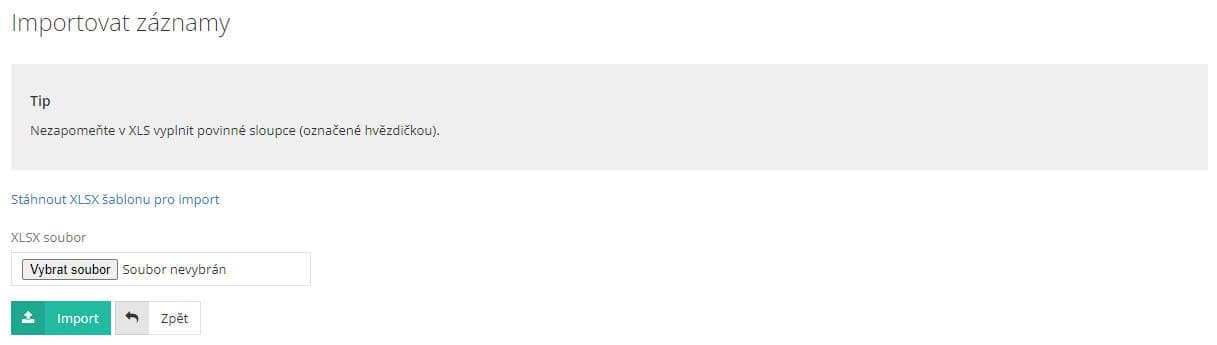
Import project records in bulk
How to:
- In the open "Project overview" agenda, press the "Import records" button.
- In the displayed form, download a sample template with a prepared data structure. You will Mandatory fields are marked with an asterisk.
- Load the completed and saved import template using the "Import" button.
Change of record

How to:
- In the open agenda "Projects - Overview of projects", focus on the project line.
- Press the “Edit Record
 ” button and edit the record values.
 - Finish by pressing the button .
 .
.Deleting a record
How to:
- In the open agenda "Projects - Overview of projects", focus on the project line.
- Press the button "Delete record ".
- Confirm the system message.
 ".
".Upload photos in bulk
This function will allow you to upload photos from external storage to projects. Individual images are automatically assigned to projects, thanks to GPS recording.
How to:
- In the open agenda "Projects - Overview of projects" press the button .
- Select the desired photos from your computer.
- Finish by pressing the button .
 .
. .
.Attention: If the project is not established, you cannot assign tasks to employees, because they will not see them.
Individual project
Projects are a basic element of the daily construction log. Thanks to projects, you know everything about construction in progress. Invoices, weather, photos - you have everything nicely together. Let's try to add a new project.
Establishment of the Project
How to:
- In the main menu, click on "Projects - Overview of projects" and press the button .
- Fill in the necessary information in the displayed "Basic information" form. At a minimum, you must enter a Name and Location.
- In the "Responsible users" tab, mark the person or persons who will be responsible for the project. Records from the "Settings - Users" tab are displayed here. Choosing a key person is mandatory.
- Additional records and information are recorded on the other tabs of the project record, which we will look at below.
- Finish by pressing the button .
 .
.The project record can be edited and supplemented at any time. In this case, press the "Edit record  " button in the line of the relevant project.
A construction log is usually created for the project. Mark the creation option on the tab "Basic information - Create a building diary". The journal created in this way will be displayed in the Building journal module.
Záložky projektu
Let's look at the individual tabs of the project in more detail.

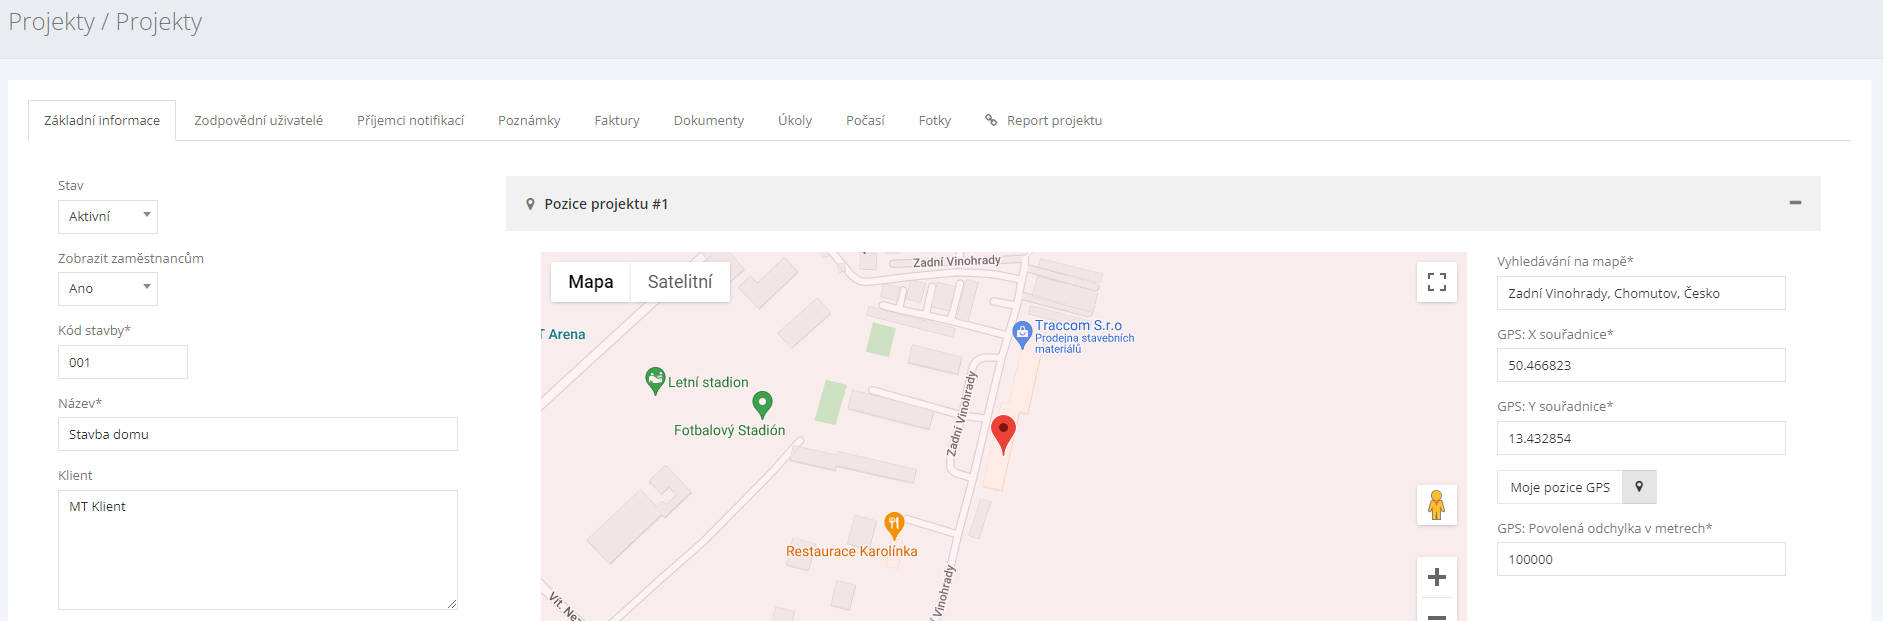
Basic information tab
An overview of key information about the project, especially companies, participants and the location of the construction.
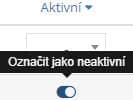
- Status – a new project always starts with the status active, which allows you to insert and edit records associated with the project. After finishing the work, the project can be locked by changing the status to "Completed".
- Show to employees - if you have any employees on the project, select "Yes".
- Construction code* - code under which you manage the project, automatically numbered 001, 002, 003, ...
- Name of the building* - the name of the building, which will be entered in the building diary.
- Client – The name of the client or company, which will be entered in the daily construction log.
- Generální projektant – Jméno projektanta či firmy, které se propíše do stavebního deníku.
- Search on the map - the address where the project is located (you can have up to 4 positions for one project).
Accountable Users tab
Application users who are responsible for this project and its management in the application. This project is available to all selected users.
Notification Recipients tab
Application users who will be notified by the system about changes to this project. The user will see the notification on the notice board.
Notes tab
The tab allows you to record text notes related to the project. Inserting a note is done by typing in the text field and saving the note.
Invoices tab
In the tab, invoice records made here or in the Invoices agenda are entered / displayed. You can add the invoice to the project here. You can find out how to add an invoice in the Invoices section.
Documents tab
Records of all documents associated with this project. Documents can be edited, sorted and imported here. Work procedures for document management can be found in the Documents section.
Tasks tab
Records of all tasks solved with this project. Tasks can be managed and entered on the tab. Workflows for working with Tasks can be found here.
Weather tab
Current records of the weather at the location of the project are written and displayed in the tab. At the same time, the weather forecast for the following days is offered.
Photos tab
All image documentation is available on this tab. It allows photos to be uploaded, categorized, viewed, downloaded to your PC and further worked with.
How to add a new photo:
- Click on the “Drop files to upload” field and select the photos you want to upload (you can also drag the photos into the field with the mouse).
- If you want to have a photo in a category, enter the name of a new category in the "New category" field or select an existing one from the scrolling list below.
- Click on “Save”.
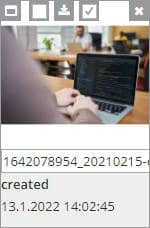
- You can show the uploaded photos directly to the client using the "Mark all for client" button. You can also mark them individually by hovering over the image thumbnail.
- Save the changes made using the button .
Download photos:
- You can download individual photos using the icon in the photo preview.
- You can download photos in bulk using the button "Mark all" and "Download photos".
 in the photo preview.
Deleting photos:
- Smazání fotografie provedete pomocí ikony v náhledu fotografie.
 v náhledu fotografie.
Project Report tab
The tab provides direct access to the Reports module. Learn more about reports here.
Project completion
Once a project is completed, it can only be closed in the system after all invoices attached to that project have been paid. Note: this is setting the invoice as "Paid", not checking the payment made by the bank. You end the project using the "Status - Completed" column or in the project overview using the switch.
Invoices
To view records of all project invoices, select "Projects - Invoices" in the main menu.
To download invoices from another system, you need to make settings in "Settings - Basic settings" in the "Invoice download" section. Alternatively, contact our customer support.
Your accounting office can access the records in the application as a user with a clearly defined scope of rights and access. You make this setting in "Settings - Users - User roles".
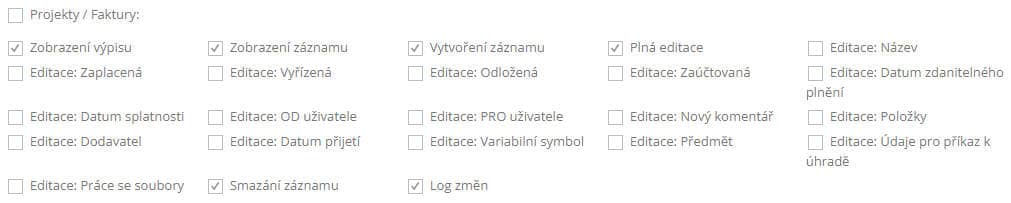
Description of settings:
- View Statement - Allows the user to view a statement/list of invoices
- Record view – allows the user to open individual invoice records
- Create Record - Allows the user to create new invoices, but does not
- Full editing – allows the user full control over already created invoice records
- Editing – allows the user limited control over already created invoice records
- Edit: Title
- Editing: Paid
- Edit: Done
- Edit: Postponed
- Edit: Posted
- Edit: Date of taxable supply
- Edit: Due date
- Edit: BY user
- Edit: FOR users
- Edit: New comment
- Edit: Items
- Editing: Supplier
- Edit: Date received
- Edit: Variable symbol
- Edit: Subject
- Edit: Data for payment order
- Editing: Working with files
- Delete record - allows the user to delete individual invoice records
- Change log – allows the user to view the history of invoice changes
List of invoices
The initial screen displays a structured overview of records. This gives you a quick overview of the status of invoices.
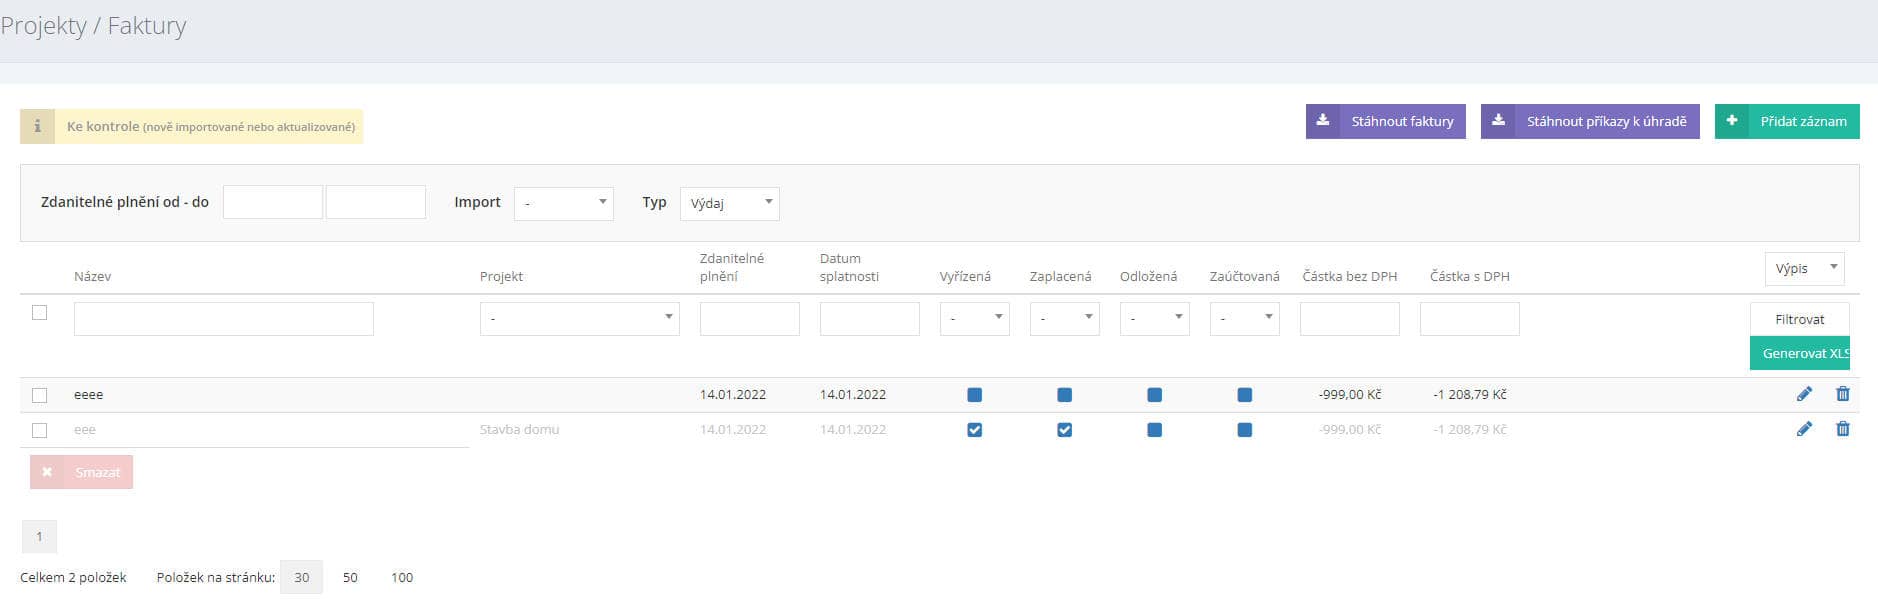
It is possible to filter between records, especially invoices "received/issued" and due dates for a specific project. You can change the properties of the invoice record directly from the main overview. By simply clicking on the icon, you can set the invoice record as "Processed", "Paid", "Deferred" or "Posted".
Invoice records can be created individually, but you can download them in bulk from the ERP system. Imported records from the ERP system are highlighted in yellow.
Working with records
The invoice record contains basic identification data about the supplier, individual items of the invoice, the due date and also a link to the project. This gives you a quick overview of project costs.
Basic information
The Basic Information tab contains the following information:
- Name* - enter the name of the invoice here for later reference.
- Posted – invoice status.
- Paid - invoice status.
- Completed – invoice status.
- Postponed – invoice status.
- Date of taxable performance - the date when the goods on the invoice were handed over to the customer
- Due date – here you set the due date of the given invoice (the overdue invoice will be marked in red).
- Files - upload the required invoice here (supported formats are PDF, JDG, PNG).
- From user - information. who created the invoice in the Stavario system
- For the user - information for whom the invoice was created in the Stavario system (it will appear on the notice board)
- New comment - here you can enter notes and comments on the invoice
- Items - enter the invoice items, price, VAT rate here and assign to the project
More information
- Supplier – here you can fill in the supplier/recipient of the invoice.
- Date of receipt - here you can fill in the date of receipt/issue of the invoice.
- Variable symbol - field for the variable symbol.
- Subject - a box serving absolutely no purpose
Data for the payment order
- Debit account - debit account number
- Credit account - credit account number
- Due date - when the invoice must be paid, after the date has expired the invoice will be highlighted in red
- Beneficiary name - the name of the invoice recipient
- Message to recipient - note to recipient
- Variable symbol - box for variable symbol
- Constant symbol - box for constant symbol
- Specific symbol - box for a specific symbol
Change log
In the change log, you will learn the history of all changes made to the invoice record. So you can easily find out when, for example, your accounting office marked the invoice record as "Paid" or "Accounted".
Invoice received or issued
Received invoices are created with a positive amount, while issued invoices are created with a negative amount.


Adding a new record
- In the "Invoices" agenda, press the button .
- Fill in the data in the displayed form:
- Basic information
- More information
- Data for the payment order
- Finish by pressing the button .
Change of record
- In the list of invoices, focus on the record you want to correct.
- Press the “Edit record " button.
- Make the necessary changes and click .
Preparation of documents for internet banking - payment orders
- Mark the invoices to be downloaded to the file.
- Press the button .
- The file will be downloaded to your computer.
 .
.Note: Payment orders are based on records entered in the invoice detail. Therefore, pay attention when writing them down.
Download the overview of invoices in XLS format
An overview of project invoices can be generated in XLS format. The created table contains basic information and data from invoices.
The Generate XLS function reflects different table settings:
- Export of all records in the overview
- Export of tagged records
- Export filtered records
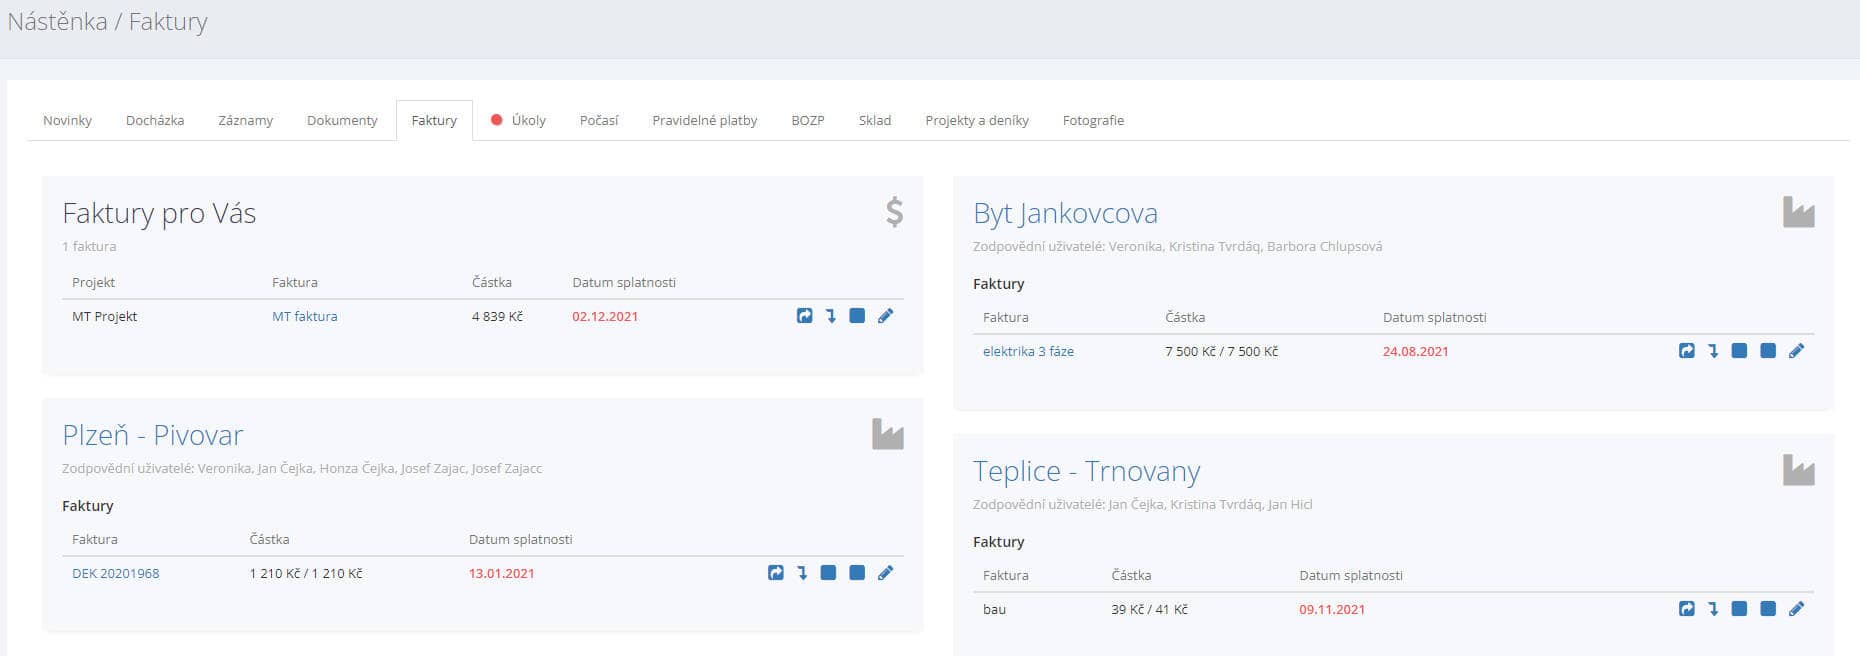
Invoices on the application board
When logging into the application, the user will see a bulletin board. One of the tabs on this bulletin board displays the invoices for your ongoing projects. It is also possible to manage invoices from the bulletin board, e.g. postpone it for later review. By clicking on the name of the invoice, the attachment of the record (electronic version of the document) will be downloaded to your computer.
Documents
In the "Projects" module, all documents for your projects are managed and entered. In the drop-down menu, select "Documents" for further activities.
Working with records
Documents can be sorted into folders according to record type. For example, the Project documentation folder, Budget and List of works, handover protocols or contractual documentation.
The list of documents can be edited and managed. You can arrange folders so that important documents are always at the top and visible. The document overview can also be filtered, for example all outstanding documents on one project.

Adding a new folder
- In the "Documents" agenda, press the button .
- In the "Record type" field, select "Folder" from the drop-down menu.
- Fill in the name of the folder, e.g. "Handover logs".
- Finish by pressing the button .
The folder has a highlighted font in the list and is supplemented with a "+" sign for better orientation.

Adding a new document
- In the "Documents" agenda, focus on the folder in which you want to include the document.
- Press the “Add record to folder ” button.
- In the "Recording type" field, choose "Recording" from the drop-down menu.
- Fill in the "Name" field.
- Set the "Resolved" field according to the status of the record.
- Choose the expiration date by selecting from the calendar.
- Fill in the project field by choosing from the drop-down menu depending on the project.
- By selecting from your computer in the “Files” field, select a specific file to upload to the application.
- Continue by choosing in the "From user" or "From user" fields. "For users (on the bulletin board)".
- Select "For employees (creates a task)" by selecting from the drop-down menu.
- You can enter a text note in the "New Comment" field.
- Optionally fill in the document settings for display to Clients.
- Show to clients - Yes/No
- For client (to sign) - to which client the document should be displayed for signature. An email will be sent to it after the recording is saved. The document will also appear in the client application interface.
- Email template for client expiration notification - which email will be sent to the client when the document expires
- Possibility to order a solution - Yes/No - activation of the option to order a solution by the client in its interface
- Finish by pressing the button .
 ” button.
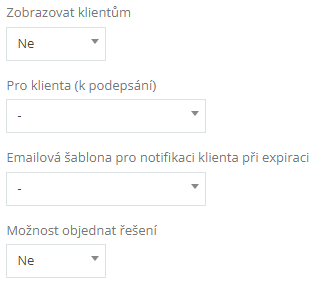
Adding a document to a folder
- In the "Documents" agenda, focus on the folder in which you want to include the document.
- Press the “Add record to folder ” button.
- Fill in the "Name" field.
- Set the "Resolved" field according to the status of the record.
- Choose "Expiry date" by selecting from the calendar.
- Fill in the "Project" field by choosing from the drop-down menu depending on the project.
- By selecting from your computer in the “Files” field, select a specific item to upload to the application.
- Continue by choosing in the "From user" or "From user" fields. "For users (on the bulletin board)".
- Select "For employees (creates a task)" by selecting from the drop-down menu.
- You can enter a text note in the "New Comment" field.
- Optionally fill in the document settings for display to clients.
- If the client's signature is required, select a representative from the drop-down menu. An email will be sent to it after the recording is saved. The document will also appear in the client application interface.
- Finish by pressing the “Save” button.
Changing the parameters of the document above the list
In the list of documents and folders, you can set properties using radio buttons. E.g. Set the document as Dissolved / Resolved. Managing the display of documents to investors is also quick and clear.

Folder management
Changing the folder order
- Focus on the row of the folder you want to move.
- Click on the “Move ” icon.
- In the displayed form, select the "Before" option in the Move field.
- In the next field, select the folder before which the record will be moved.
- Finish by pressing the button .
 ” icon.
Putting a document in a folder
Unclassified documents can be moved to their own folder later.
- Target the line of the document to be moved to a specific folder. Press the “Move ” button.
- In the Move field, select "To".
- In the next box, select the destination folder.
- Finish by pressing the button .
Deleting a folder
Warning: This step is irreversible and all documents in the folder will be deleted.
- In the list of documents, focus on the folder you want to delete.
- Press the “Remove ” button.
- Confirm the program message.