Tasks
Record of tasks assigned by all participants in the construction process. Tasks can be created directly on the construction site via a mobile application or from the web interface (ERP).
Task overview
It allows entering new tasks, displays incoming tasks from the mobile application and provides space for task management. Tasks are divided among individual users - solvers. You can have an immediate overview of who is solving individual tasks on the selected project. Individual task records are supplemented by a chat in which all the comments of the involved participants are displayed. Image documentation is also part of the task record.
The task record is divided into several tabs, according to the properties of the information on the cards.
The first information about the tasks is available on the application board. The fastest way to get to the details of the task is to click on the task. Employees see their tasks, or The tasks they are assigned to. In the mobile application, it is possible to display all tasks or to turn on the filter and display only "My tasks".
We have divided the origin of the tasks by color:

Task statuses and solutions in the system:
- New
- It is in process
- Solved
Assignment of tasks is expected mainly from the construction environment and employees enter them from the mobile application. Such a record is synchronized to the ERP application with the setting "New". If the user on the construction site in the application sets the task to be "Complete", then it is displayed in the ERP system in the status "Progressed".
Perform further editing of recorded records in the ERP system in the browser.
All changes, corrections and additions are registered on the LOG changes tab. The application administrator has access to this information. It is also possible to correct incorrectly entered data from the application, for example, if the employee does not describe the task sufficiently or assigns it to the wrong project.
Attention: If the project is not established, you cannot assign tasks to employees, because they will not see them.
Task creation and chat
How to create a new task from the mobile application
- Log in to the mobile app using your credentials.
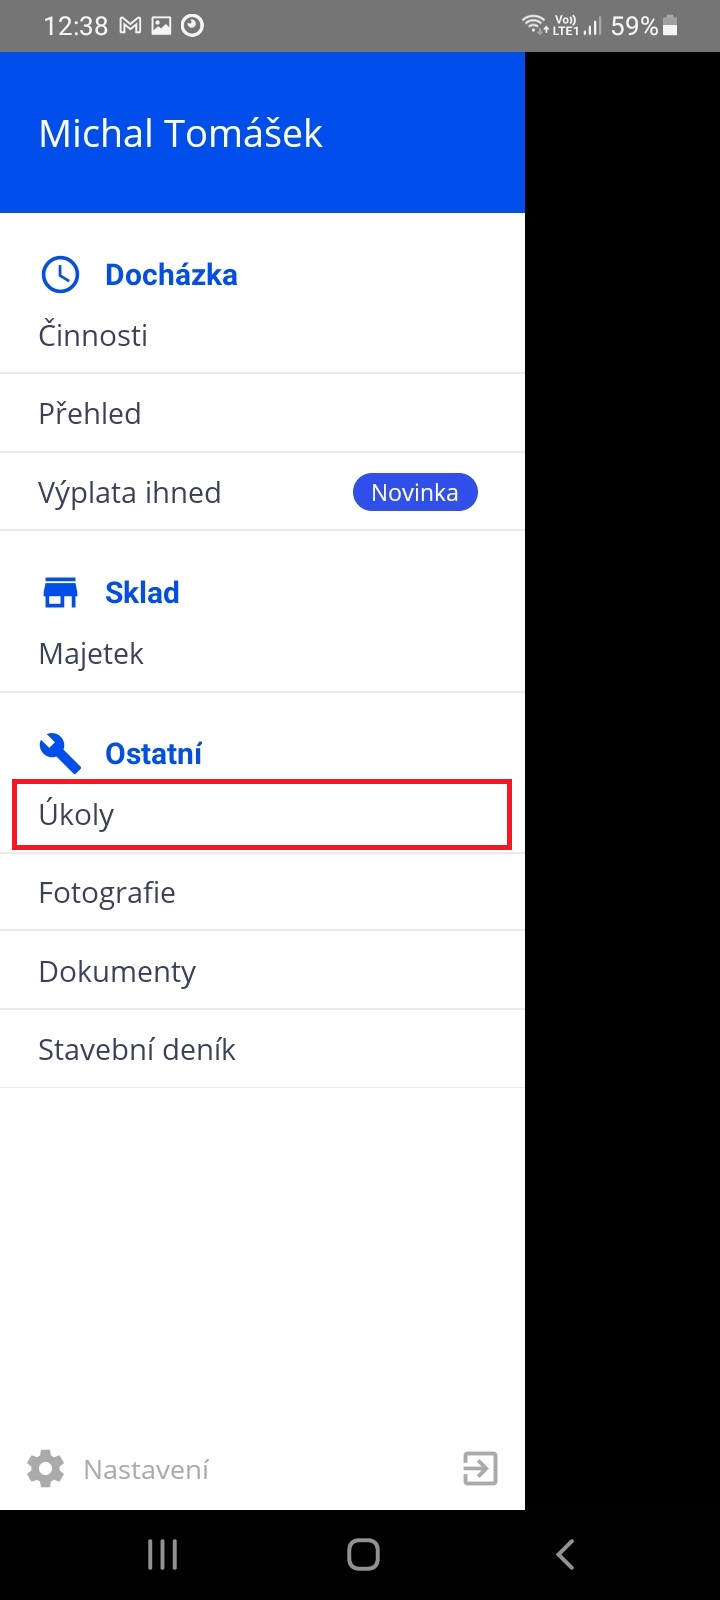
- Click on the menu and select “Tasks” in it.
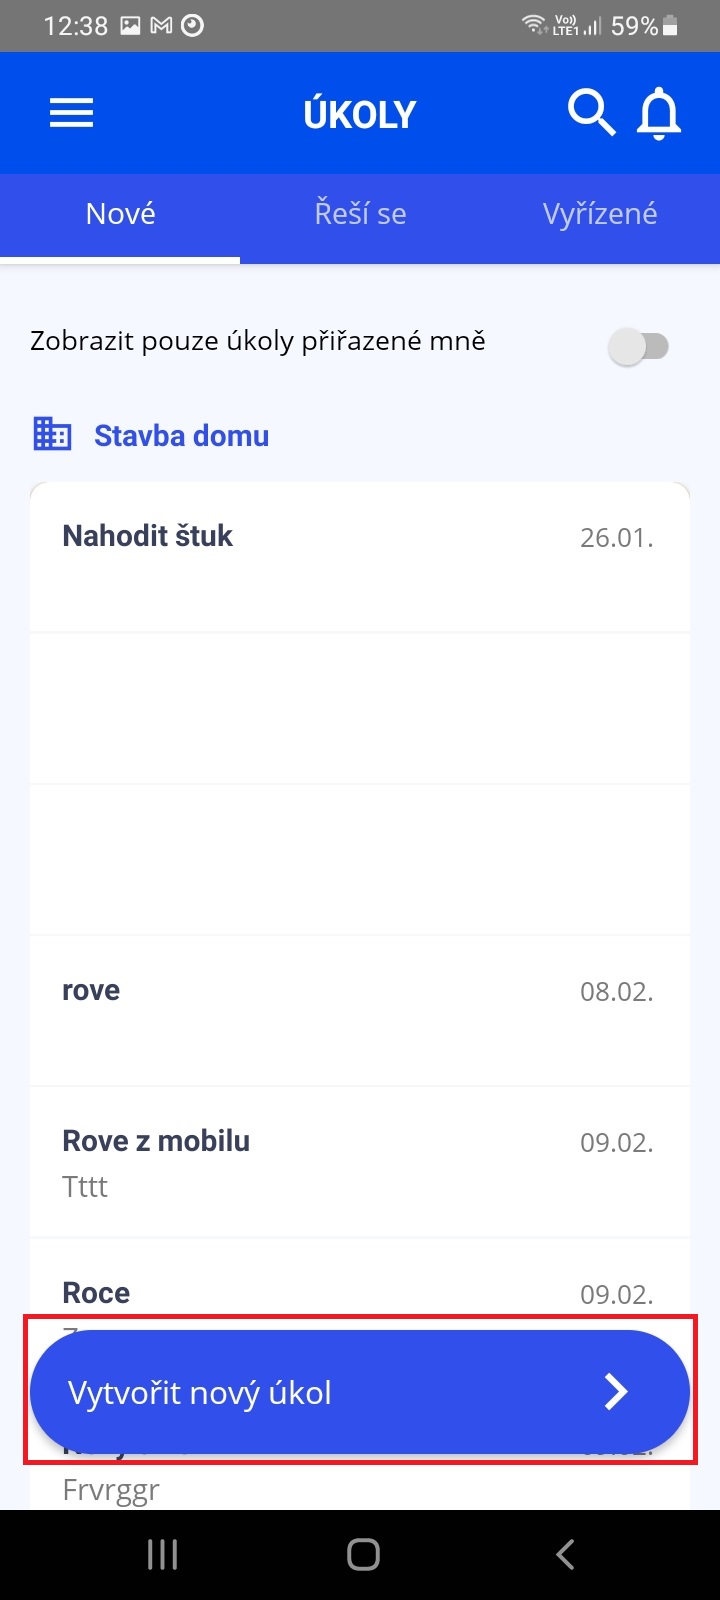
- Here you see an overview of all the tasks you have access to. Click on “Create new task”.
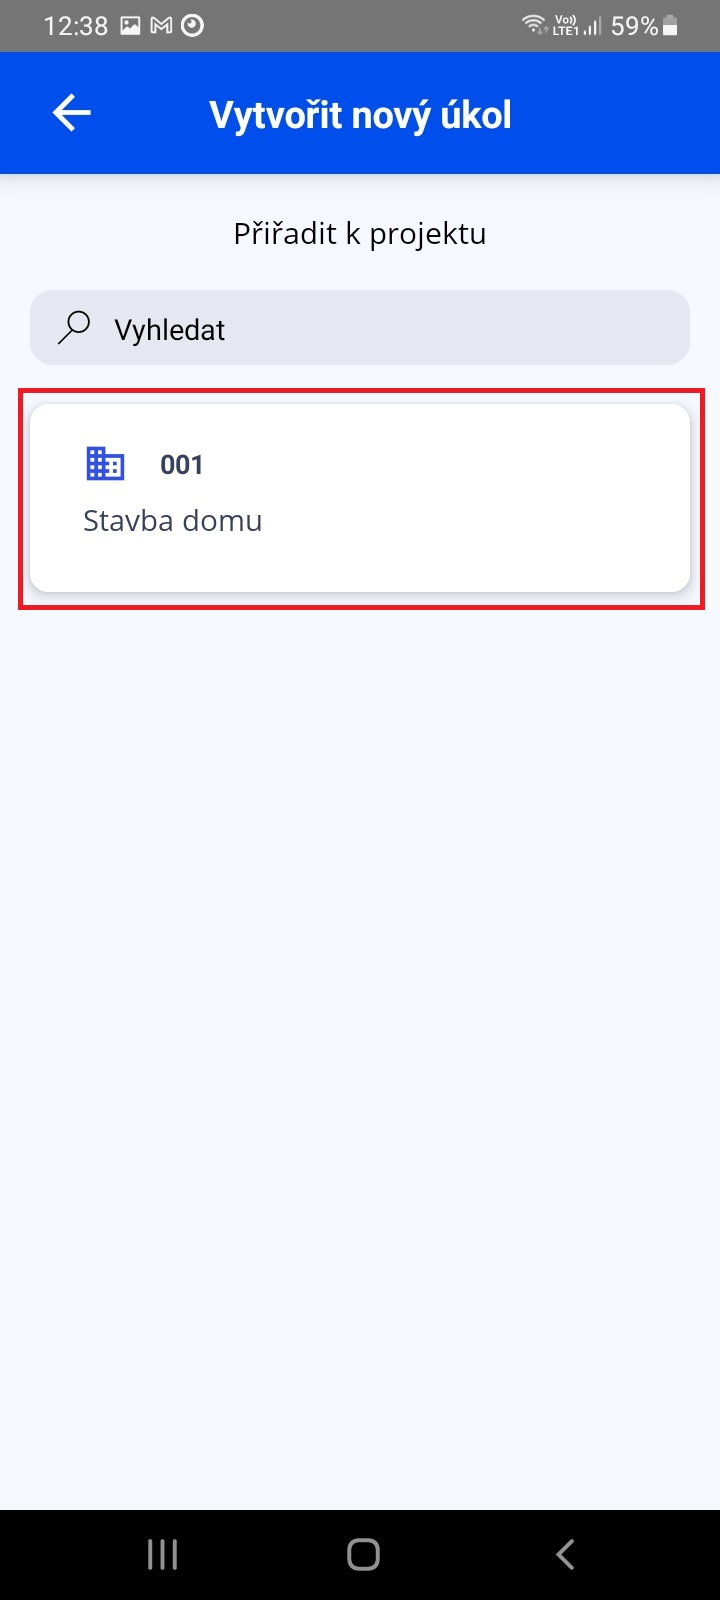
- Select which project you want to assign the task to.
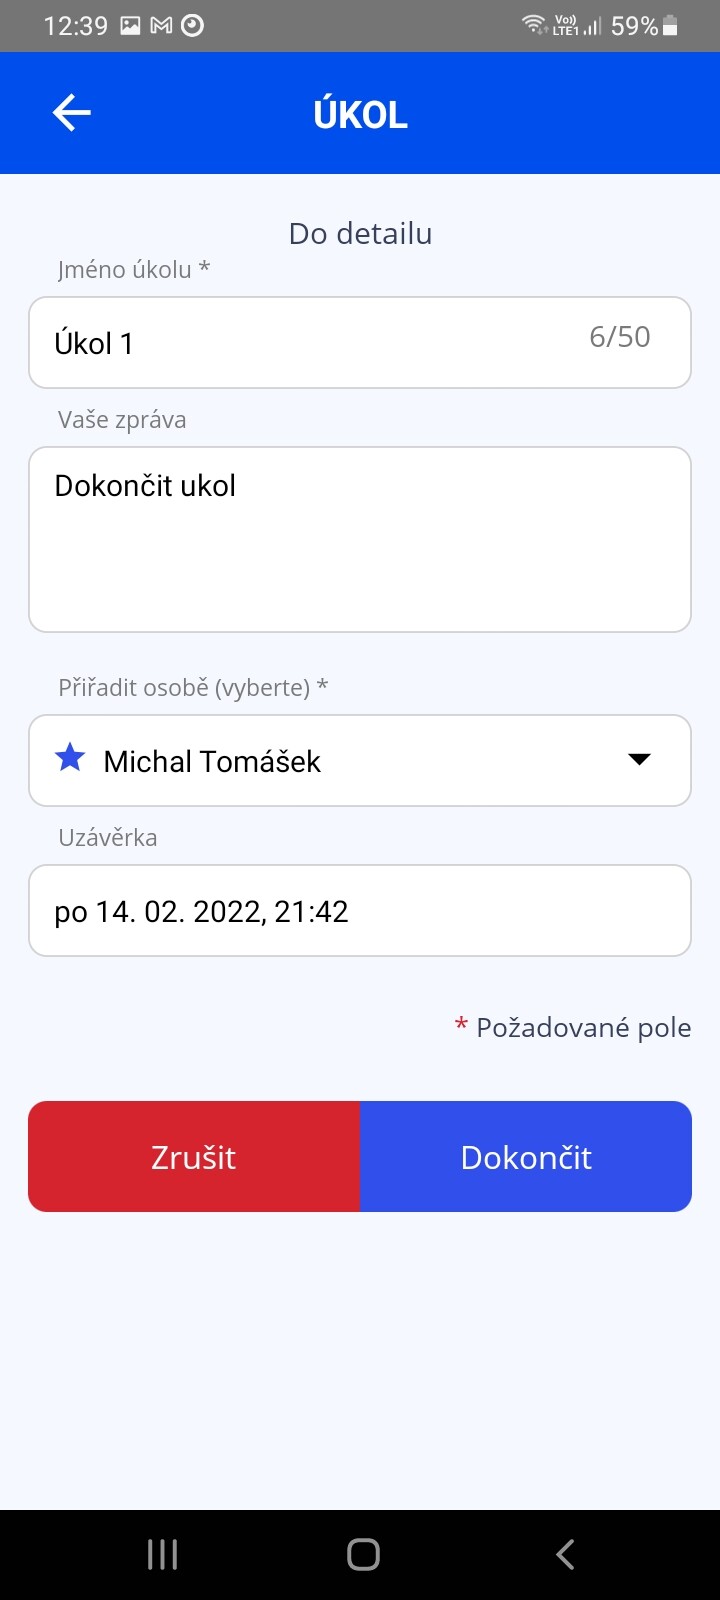
- Fill in the following information:
- “Task name*” - this field is mandatory
- "Your message" - a message that will start a conversation about the given task and will be seen in the web interface as "Initial description of the task"
- "Assign to person (select)" - assigns the task management to the user, this field is mandatory
- "Deadline" - enter the date and time when the task should be completed
- You create a task by pressing the "Finish" button.
- The app takes you to the task detail where you can communicate with others and send photos.

- Send a photo using the camera icon in the lower right corner of the screen.
Procedure for creating a task from the web interface (ERP)
- In the "Tasks / Overview of tasks" agenda, click the button
 .
. - Fill in the following information in the "Basic information" tab:
- "Status" - automatically set to "New" when created
- "Task" - brief title of the task
- "Initial description" - contains a text description of the task entered in the mobile application, in the mobile application the field is marked as "Your message"
- "Project" - here you link the task to a specific project
- "Property record" - allows you to link a task with a specific item of property, e.g. Task for extraordinary machine service
- "Entered by an employee" - the name of the author of the task
- "Entered by the client" - indicates the representative of the client who processed this record
- “Date of Entry” -
- "Date" - taken completion date from the mobile application
- “From User” -
- “For users” -
- In the "Attachments" tab, you can see the files and photos uploaded to the task. When the task is created, the tab will be empty. You can insert attachments using the chat window or using the "Choose files" button.
- In the "Employees" tab, select the employee for whom the task should be assigned.
- In the "Clients" tab, select the clients for whom the task will be visible and will be able to comment on it.
- Finish by clicking the button .
 .
. .
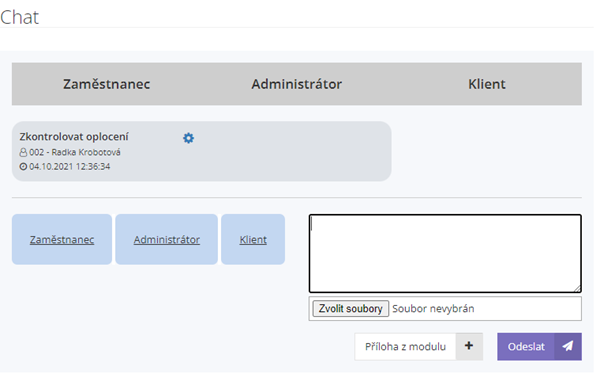
.Principles of using the chat window
The chat window displays communication while solving a task. Chat allows you to set the distribution of messages of the solved task to selected employees or a client representative. You select the addressed employees and client representatives on the other tabs of the task.
- In the "Tasks / Overview of tasks" agenda, open the entry to which you want to add a text note.
- In the open task record, fill in your notes in the chat window.
- Choose the addressees of the message by clicking on the button marked "Employee" or "Client". You can tag both recipients.

- If necessary, attach an attachment by selecting it from your computer.
- Finish by pressing the button .
- In the chat window, the recipient field of the message will be highlighted in color. The inserted message can still be edited after pressing the button "Edit message ".
- In order for the message to be displayed to the Client's representatives, it is necessary to go to "Editing the message ". Expand the settings block "Show message to clients" and mark with a checkmark those persons to whom the information should come.
- In the "Show message to employees" settings block, select the people to whom the message should be displayed.
 .
. ".
".This setting only needs to be done once. From this moment on, messages will be sent to all marked people. If you want to edit a recipient, open the message settings again.
Example
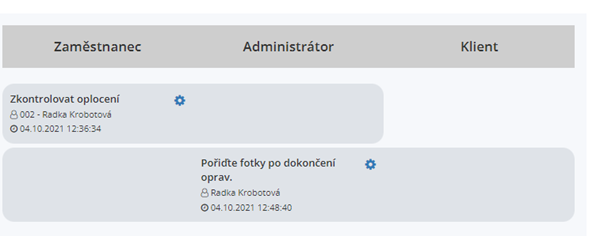
A task is created in the mobile application environment and is synchronized to the ERP system environment. When entering, the employee fills in a text description of the task. This description will be displayed in the task chat in the "Employee" section.
To reply to all participants, turn on sending a message using the Employee, Client button, as shown in the illustration.
The sent message will then appear in all three panels in the chat window. At the same time, it is sent both to the mobile application to the relevant employee and to the client interface.
Task solver settings
- In the open task, display the "Employees" tab.
- Tag the relevant employee.
- In the drop-down menu, set the status of the task to "Progressing".
- Finish by pressing the button .
Note
Although it is possible to mark multiple records, we recommend marking only one person at a time. This employee will receive information about the task via the mobile application.
Changing the Task Status
You can quickly set a task as "Resolved" from the task overview in the ERP interface. Measure the line on the selected task. In the first column, select a new status from the drop-down menu.
Tasks with regular repetition
You can also enter tasks with regular repetition on a daily to several-year basis. So let's see how to set up such a task.
- In the "Tasks / Overview of tasks" agenda, click on the button "Regular repetition commands".
- In this agenda "Tasks / Recurring orders" click on the "Add recurring order" button.
- Fill in these details
- "Active" - choice of whether the regular task should be active immediately
- "Repeat interval" - choose the interval after which the task will be repeated
- "Task" - fill in the text input of a regular task here
- "Project" - select from the drop-down menu to assign to a specific project, assignment to a project is not mandatory, if it is, for example, a generally valid task
- "Property record" - linking a regular task with a specific asset, this way you can specify, for example, regular maintenance or cleaning of tools
- "For users (on the bulletin board)" - here select the application user to whom this task will be displayed on the ERP bulletin board
- "Start date" - the date of the start of the repetition of the task
- Go to the "Employees" tab and select the company employee responsible for the task.
- Finish by clicking the button .
Changing a regular task
In the open "Tasks / Task Overview" agenda, press the "Regular Repeat Commands" button and continue:
- In the list of regular commands, press the button “Edit record ”.
- Make the necessary changes in the displayed form on the "Basic information" tab. To temporarily suspend task repetition, set "Active" - "No".
- Finish by pressing the button .
 ”.
”.Changes made to records are synchronized with the mobile application as soon as an internet connection is available.
Setting rights and accesses for tasks
In the "Settings / Users" agenda, click on the "User Roles" button. In the list of roles, edit the relevant role to the extent that in the "Tasks" section, check or uncheck the functions that you want to enable or disable for individual roles.