Clients
Agenda Clients
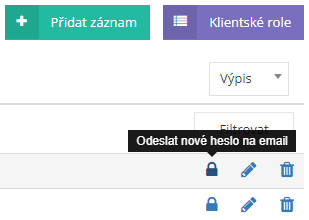
In this agenda, you manage the individual accesses of clients, investors or supervisors. Uniform management of accesses and settings is carried out using Client roles. The client and his representative have their own access and login details for viewing the Construction Diary. In case of password loss, it is possible and the application can send the password to the email using the button "Send a new password to  " in the client list.
Client access
The project client has access to the data through their own access credentials. In the application, the client's representative can read data, for example photos from construction, enter tasks and sign documents.
Before creating a client, you must create a client role first, where the client's access to the construction log and its records is defined.
Client role creation
The role determines the range of access and availability of information. The role setting also determines the scope of modification of individual parts, in the sense of reading or editing. Client access, or its users, it is bound to the system by a login name and password. You can create different role settings for different client representatives.
Example: Jan Novák, the client's representative, is allowed to write and edit documents. Additionally, another client representative can delete documents.

- In the agenda "Projects" select in the drop-down menu "Client" .
- Press the “Client Role” button.
- Enter the “Name” of the role. This information is mandatory.
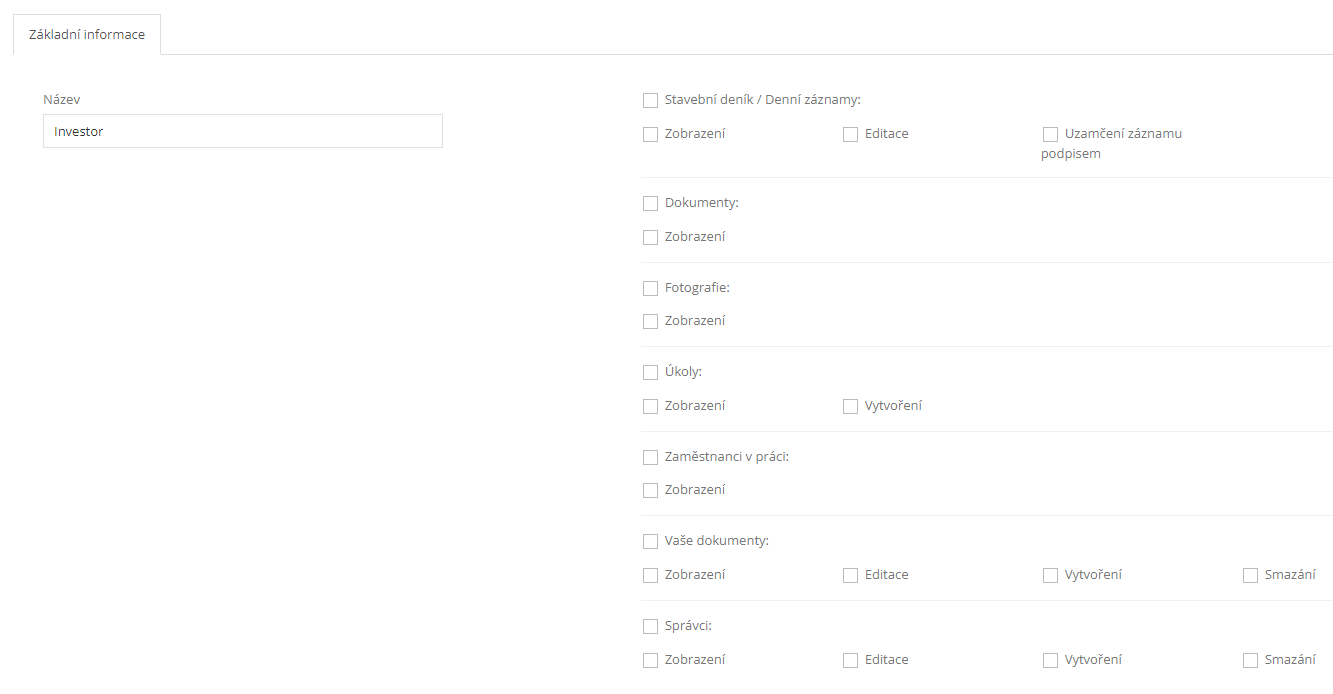
- In the displayed form, continue by ticking the scope of permissions and accesses to individual parts of the Construction Diary record.
- Construction diary / Daily records
- Display – enables the client to preview the daily entries of the construction diary
- Editing – allows the client to comment on daily records (according to the law only within 3 days from the creation of the record)
- Lock record with signature - allows the client to lock the daily record with a signature
- Documents
- View - allows the client to view the documents attached to the given project
- Photos
- Display - allows the client to view the photos attached to the given project
- Tasks
- Dosplay - allows the client to view tasks attached to a given project
- Creation - allows the client to assign tasks to users connected to the given project
- Employees at work
- Display - allows the client to see the currently active employees on the project on the bulletin board
- Construction diary / Daily records
- Finish by pressing the button
 . To continue by adding another entry, press the button .
 . To continue by adding another entry, press the button
  .
.Tip. "Daily Logs - View - Yes" + " Editing - No" button, the records will only be displayed to the client in PDF format.
Deleting a client role
- In the agenda "Projects" select in the drop-down menu "Clients" .
- Press the button .
- Focus on the row to be deleted.
- Press the button "Delete record " .
- Confirm the application message by pressing the "Yes, confirm" button.
 .
. " .
" .We have the role active, so let's move on to creating the client itself.
Creating a Client record
- In the "Projects" agenda, select "Client" from the drop-down menu.
- Press the button .
- In the displayed form, fill in the fields: "Name", "E-mail".
 .
.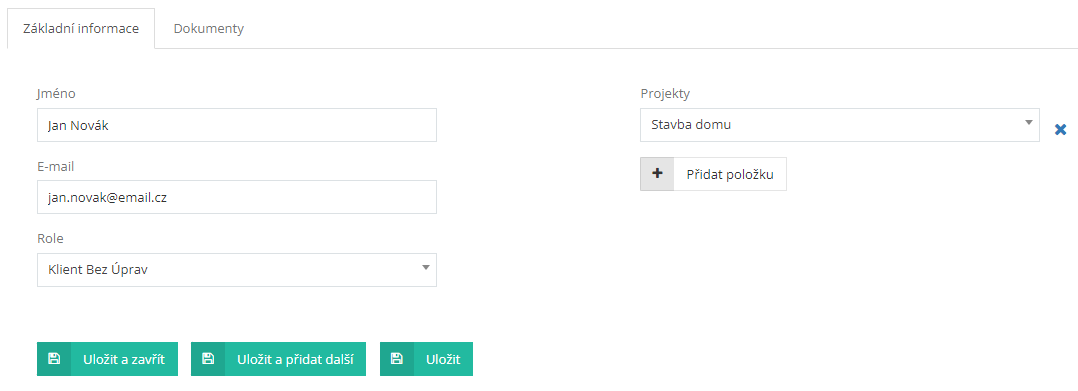
- Select the client role in the "Role" column by selecting it from the drop-down menu.
- In the second column, continue by assigning a project. In the "Projects" field, press the "Add Item" button.
Attention: Without assignment to the project, the client will not have the data available.
- The field displays a list of active projects that you have established in the system. Client can be assigned to multiple projects.
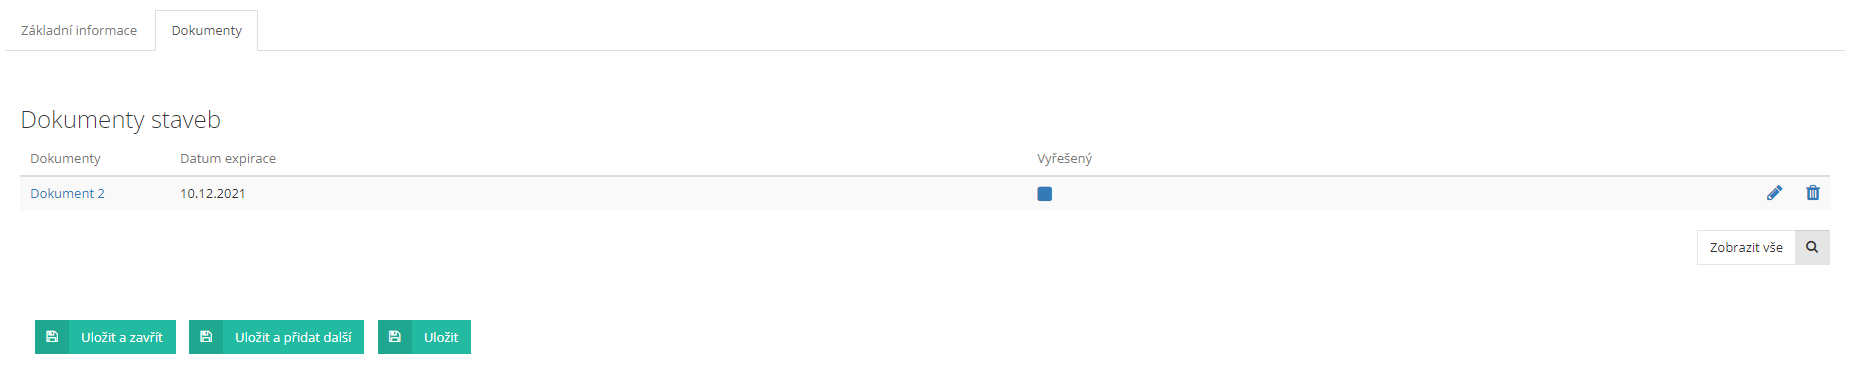
- A list of all documents that are displayed to the client is available on the "Documents" tab.
- Finish by pressing the button .
 .
.Sending access data to the client
Access data are sent to the client automatically after the record is created. If necessary, it is possible to manually trigger the resend login data action.
- In the "Projects / Clients" agenda, focus on the line of the client to whom the data should be sent.
- Na konci řádku klikněte na tlačítko “Odeslat nové heslo na email ”.
Editing a client record
You usually set up to edit a client record when you start a new project with a client or want to edit an email address for communication.
- In the "Clients" agenda, focus on the client line.
- Press the button “Edit record ”.
- Complete or edit the required information.
- Attach the new project by pressing the button .
- Dokončete stisknutím tlačítka .
 ”.
”. .
.Attention: The new project that you want to connect to the client must first be created in the project module.
Client interface
From this part of the application, process participants can communicate with each other, submit requests, read and sign entries in the construction diary.

The application is clearly divided into agendas:
Tasks
Tasks are the focal point for communication with the supplier. From here you enter new tasks and reminders. Photos are an attractive way to enter a task requirement. The client or his administrator can comment on a specific photo with a request to change or correct the subject of the work.
Photos
A selection of photos taken by employees on the construction site during the implementation of the project. These photos are forwarded to the client via the supplier interface. You thus have a perfect overview of the progress of the construction work. As soon as the new photos are processed and sent to the client, you will receive an informational email notification.
Daily construction log
Daily construction log, daily records are the focus of information. In this place, the client has an overview of what is happening on the construction site, the inspections and tests that have been carried out and what problems are currently being solved. He can add his own notes to the entries.
Employees at work
An immediate overview of employees who have recorded arrival at the construction site either using the mobile application or the record is registered by the application administrator.
Documents
The Documents section of the application is used as a place for submitting, approving and signing documents. The choice of document type is not limited. It can be e.g. order, work budget approval, etc. in different formats.
Client
The clarity of the application and the simplicity of operation will allow you to always have an up-to-date overview of what is happening on the construction site. All data is available to you online from a web browser. The data is available to the client and users who have been granted access by the client using their own credentials.
You get an immediate overview of the number of craftsmen, mechanization and work done on the construction site. The client can enter requirements for the contractor, revise and sign contracts, and of course the most important act is signing the diary.
Fundamental agendas
- Tasks
- Photos
- Construction diary
- Employees at work
- Documents
Login to the application
The application administrator will create your project and generate your login information along with it. These data were sent to you by the system to the indicated contact email.
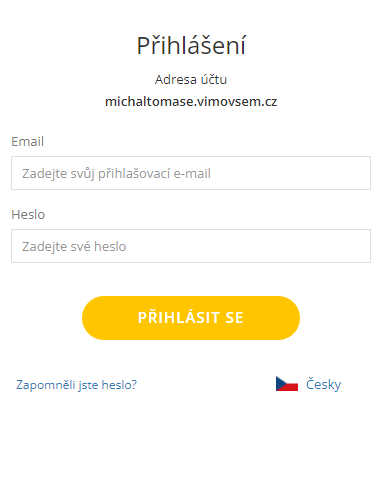
The scope and breadth of displayed information is determined by Client role. Setting client roles is the responsibility of the system administrator.
Overview of basic application modules in the client interface
Tasks
Agenda Tasks provides a simple tool for creating tasks for contractors. The Tasks board clearly displays tasks by status, e.g. "New" or "Solving with", "Resolved".
At the same time, you also have an overview of who created which tasks.
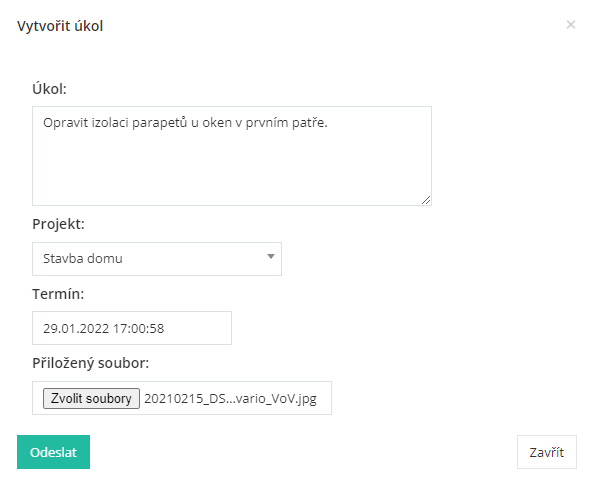
Adding a new task
- In the "Tasks" agenda, press the "Create task" button.
- In the "Task" field, write a detailed description of the required change or action.
- Check the assignment of a task to a specific project.
- Výběrem z kalendáře vyberte požadovaný termín a čas dokončení.
- Attach files (eg photo or document).
- Finish by pressing the button .
 .
.
Tip: Did you take a photo of the defect while visiting the building? Enter a new repair task and attach the photo file as an attachment.
Communication over the tasks in progress
The task and their creation is initiated by different persons. The client raises its task by adding it in its interface. Attach to the task e.g. attachment. Along with a text note, he sends the task to the contractor. As soon as the status of the task changes to "Processing", an update is sent to you (the client representative).
The record of the accepted task together with the image attachment will look like this:
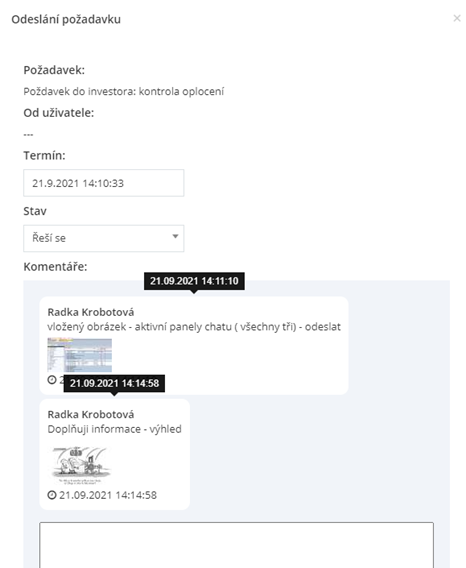
- Attachments can be viewed conveniently and the task can be answered by writing in the notes field. Alternatively, you can insert the attachment again.
- Finish by pressing the "Send" button.
Photos
The agenda clearly displays all photos taken during the realization of the work. The pictures are taken by the employees on the construction site. They are then sent from the system to your interface. You can send a request for a change, complaint or correction using a picture. The photos that appear in this section of the application are part of the diary entry.
Note: Did you receive an email notification about the availability and upload of new photos? As soon as new records (photos and videos) are added to the application, the system will send you a notification by e-mail.
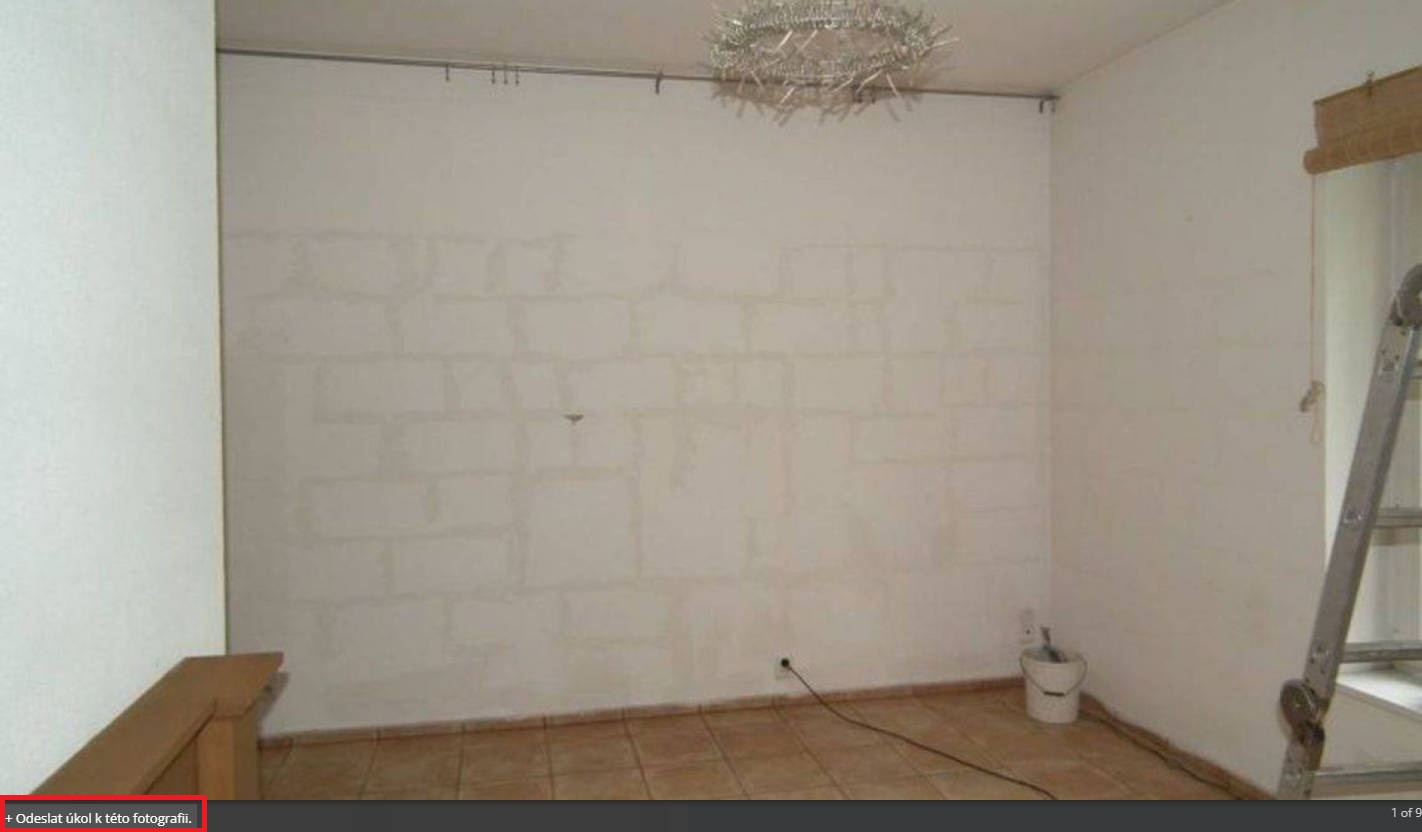
Task assignment from a photo
When viewing photos uploaded on the construction site, you may notice a defect. Directly from this photo, you are able to send a task for repair.
- Open photos in the "Photos" menu, click to open the image.
- In the lower left part of the enlarged photo, click on the field "Send a task for this photo" to enter a request.
- In the displayed form, fill in the fields:
- A description of the task requirement
- Choose a date and time to complete the task
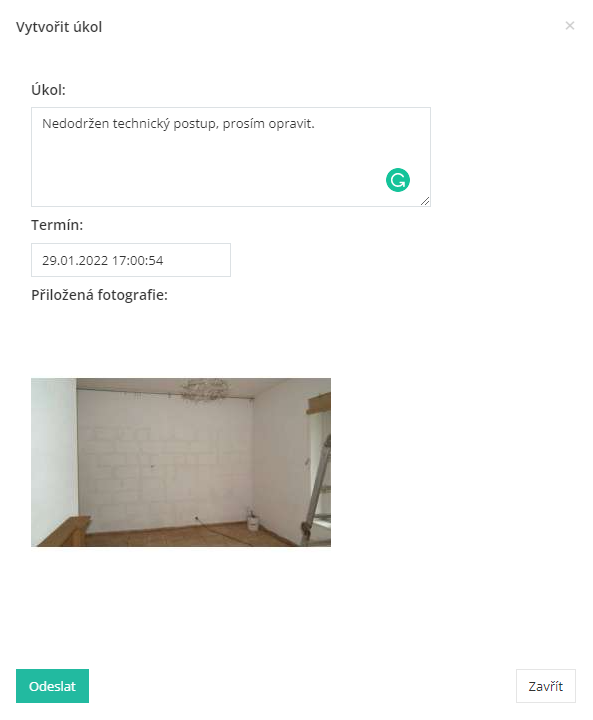
- Finish by pressing the button .
Daily construction log
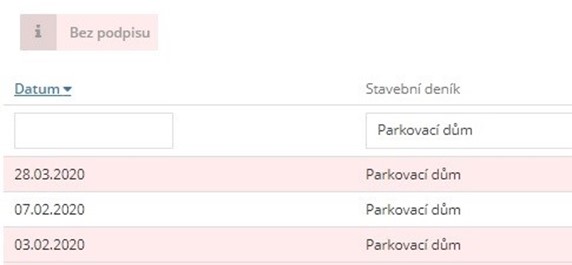
Overview of logs
Color highlighting of records will quickly give you an overview of unfinished (unsigned) records.
Reading the record
Records can be opened in two ways: by pressing the "View record" button or by clicking the mouse on the relevant line.
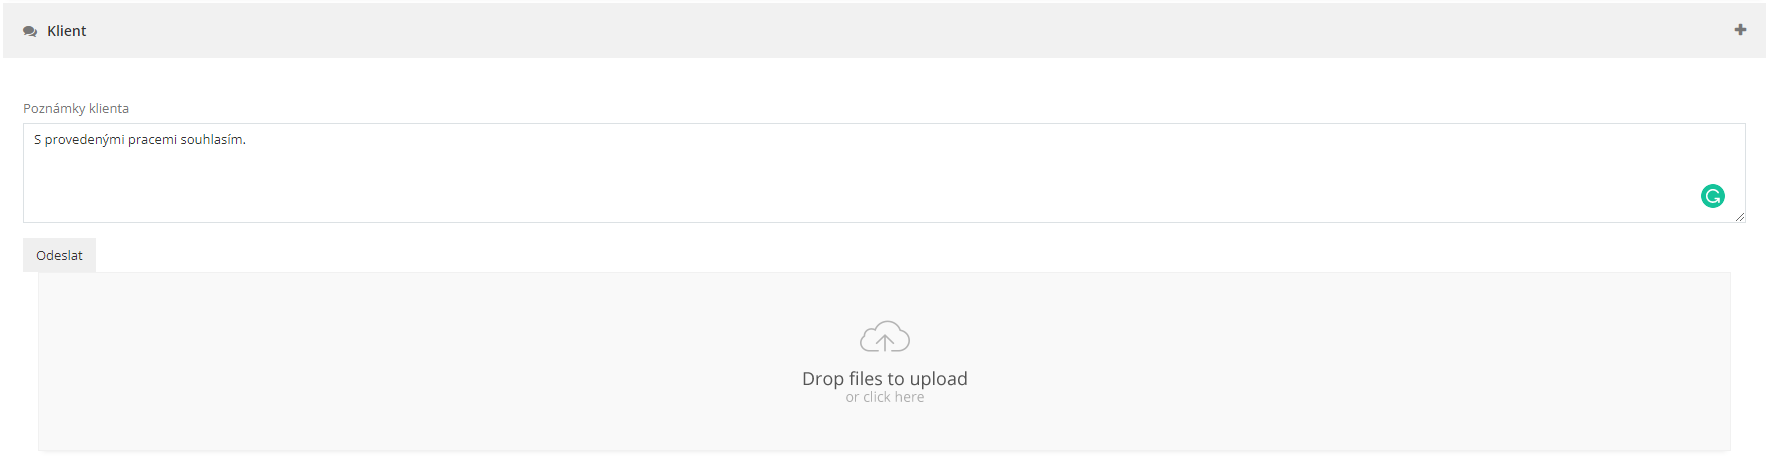
Individual parts of the journal entry are represented by a highlighted panel. By pressing the "+" button, it is possible to open the detail and read the records. The field for recording the client's notes on the progress of the construction or the work performed is at the end of the form.
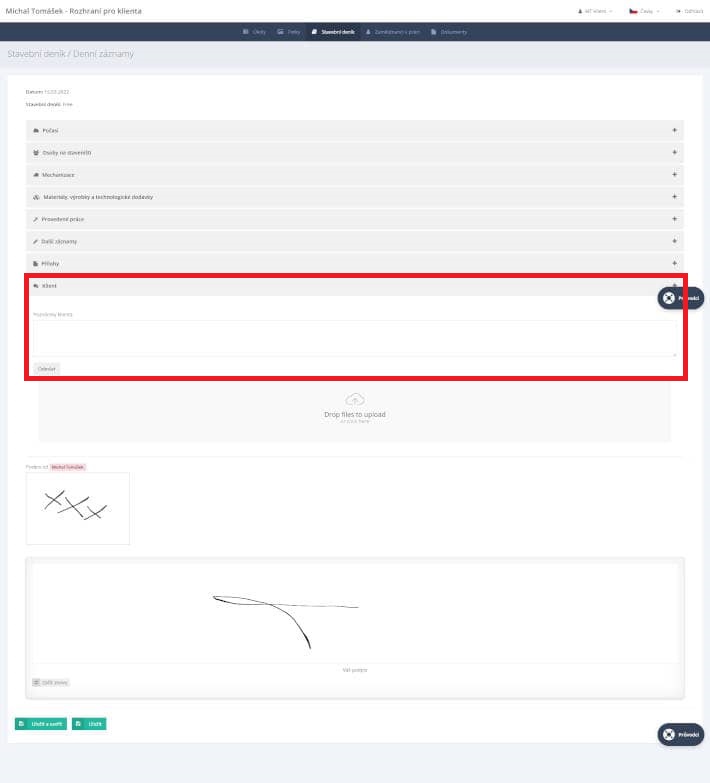
Adding a note to the construction log
- Focus by date on the row representing the record you want to edit.
- Press the button "View record " .
- In the open form, go to the "Client" field.
- Press the “+” button to open the field detail.
- Fill in your comment in the text field.
- Finish by pressing the “Submit” button. The note made will be highlighted in red in the daily record.
After sending, the client's note is supplemented with the name and role of the user/client representative.
Attachment of daily record attachment
- In the daily log tab "Client." open the description box and press the mouse into the "Drop files to upload" .
- Choose the attachment from the location on your computer.
- Finish by pressing the “Save” button.
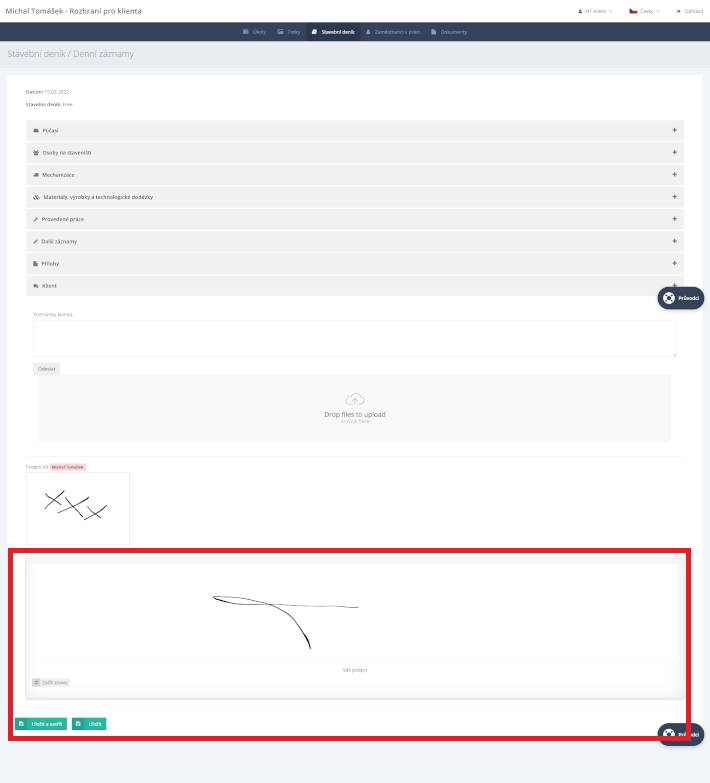
Signature of construction log and daily records
Colored highlighting of journal entries:
- Red highlight - unsigned entry
- White highlight - a record signed by the client
For the signed daily record, both the client's signature and the construction manager's signature are displayed.
Signing the record individually
- Focus by date on the line representing the record you want to sign.
- Use the mouse to sign the entry in the left part of the form.
- If the signature cannot be completed, clear the signature field by pressing the "Start again" button.
- Press the “Save” button. The record will be supplemented with the Client flag.
Signing a record in bulk
Bulk signing of records is usually done with a weekly period.
- In the open agenda "Overview of journals" select the relevant journal. If you only have one journal, it will open immediately.
- In the right part of the form, press the "Sign all" button.

Print record
Export of one daily record. The output is completed in PDF format.
- In the open agenda "Daily construction log - Overview of diaries" focus on the entry you want to print.
- Press the button "Print Record " .
- A PDF file will be saved to your computer, which you can then print.
 " .
" .Journal printing
Exports the complete log - all entries. The output is completed in ZIP format.
- In the open agenda "Daily construction log - Overview of construction logs" focus on the entry you want to print.
- Press the button "Print Journal " .
- A file in ZIP format is saved to your computer, which contains the complete diary in PDF format and any other documents attached to the diary.

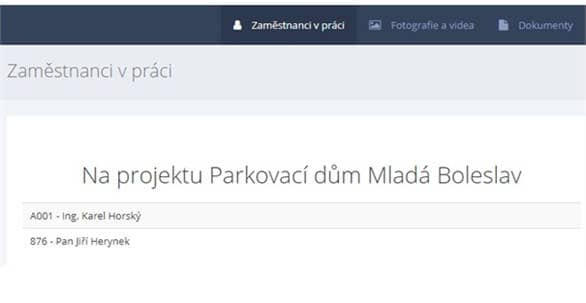
Employees at work
The agenda provides a quick overview of the employees present on the construction site. The data is displayed synchronized with the attendance entered from the mobile application.
Note: If the data is not synchronized, e.g. due to the unavailability of the Internet connection, the data will be loaded with a delay.
The information displayed here is read-only. It is not possible to edit them.
Documents
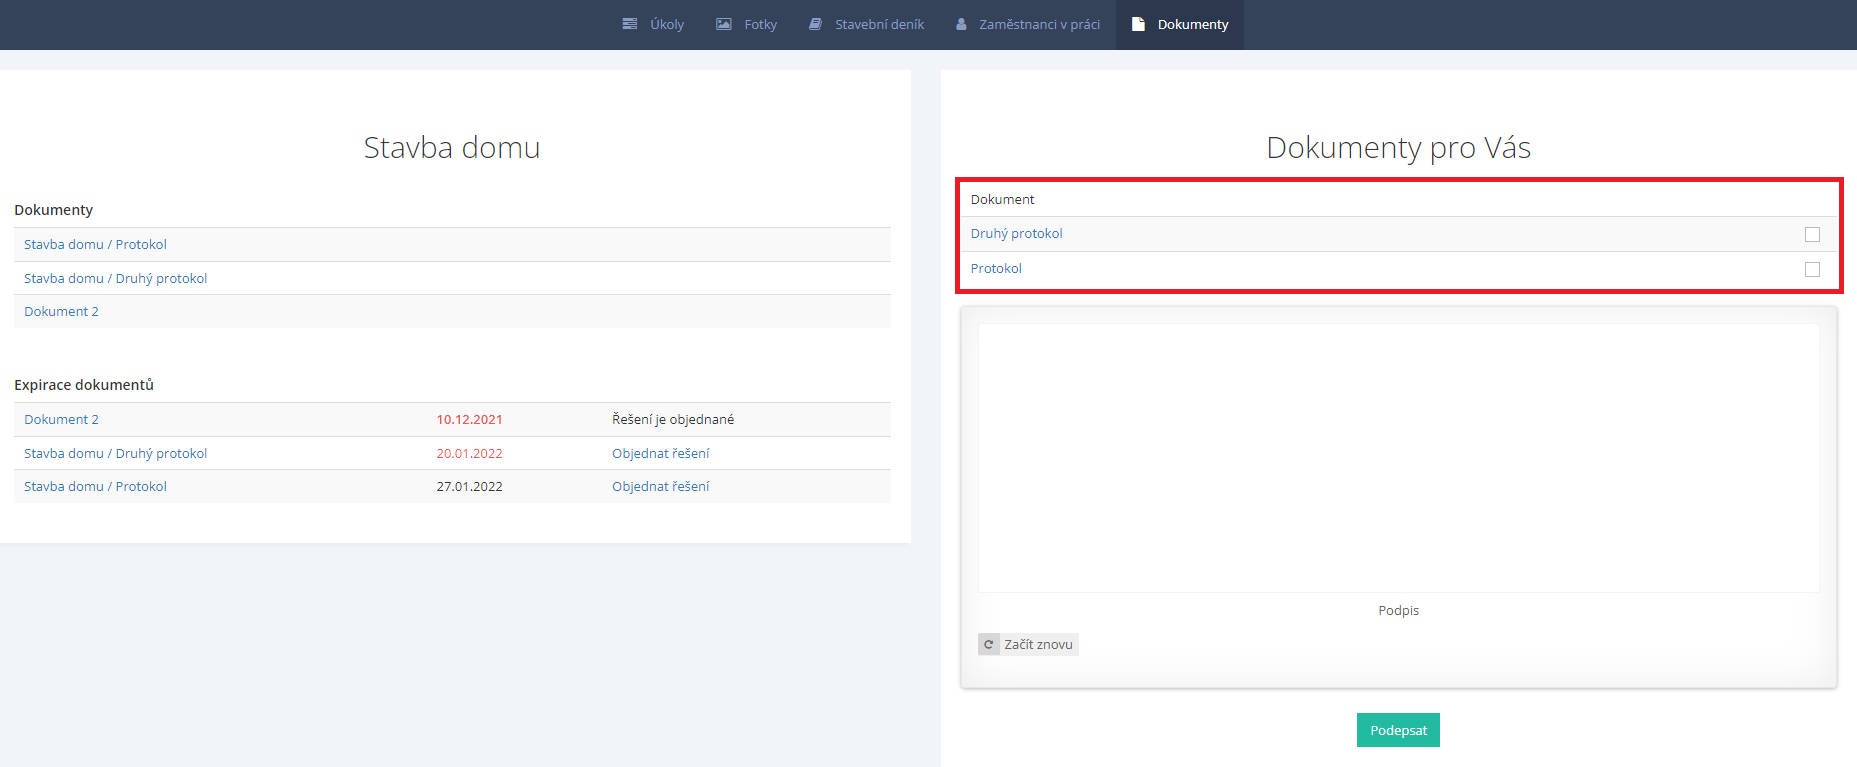
View all documents. Entries are divided by projects and level of development. The expiration dates of the documents are highlighted in color. You can conveniently download individual documents to your computer by clicking on the document name.
The daily record may have an attachment, e.g. protocol. The client's representative may be required to sign such a document.
Documents to be signed
You can sign documents individually or collectively.
- Focus on the line of the document you want to sign. In the right part of the form, tick the documents you want to sign.
- Move the mouse to the signature field and sign.
- If the signature cannot be completed for various reasons, delete it by pressing the "Start again" button.
- Sign again and press the “Sign” button.
Your Account
Overview Records of client data and access. Login information is clearly listed here.
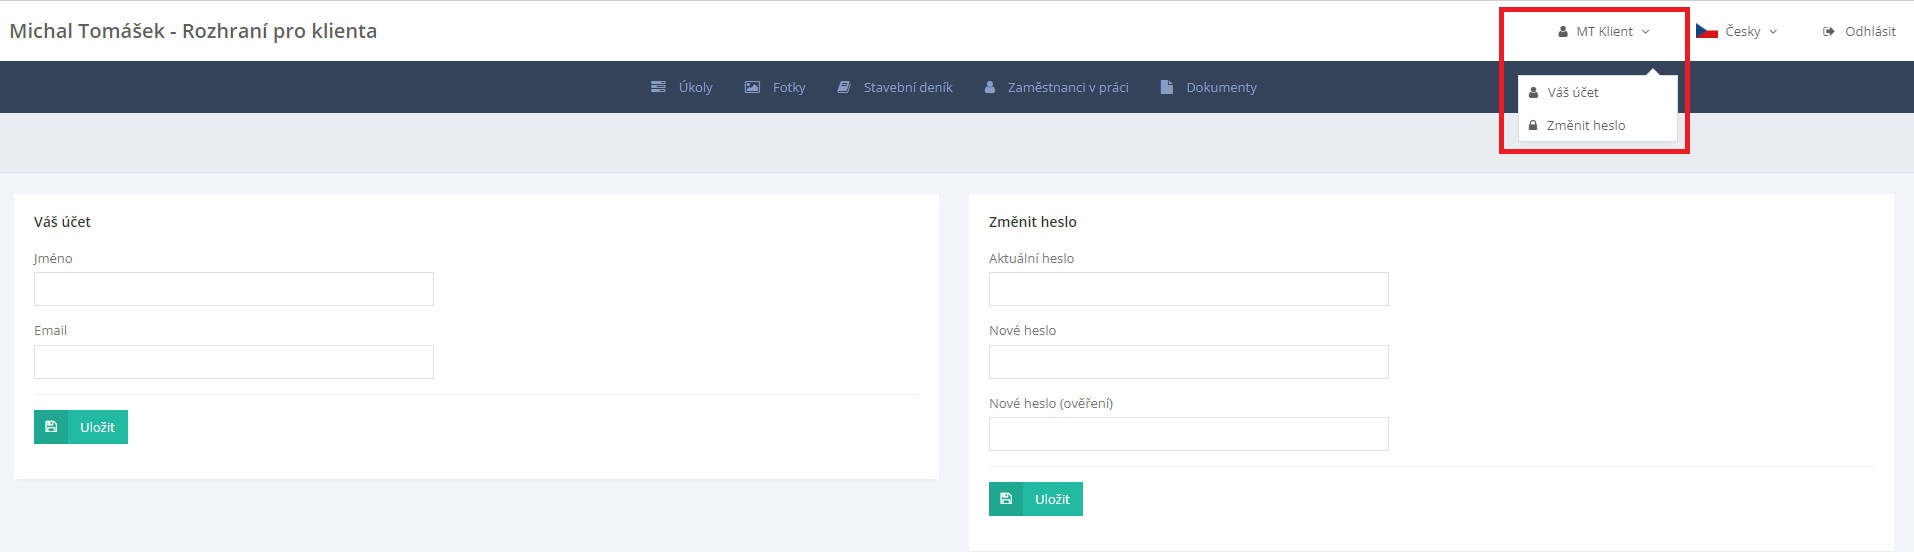
It is possible to modify these data.
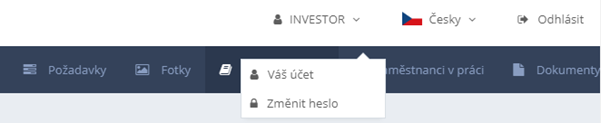
- In the main bar of the application, click on the button of your client name, e.g. "John Doe".
- In the displayed menu, continue by clicking on the "Your account" button.
Changing the password
When you created your account in the system, a password was generated for you and sent to the specified e-mail address. The application password can be changed.
- In the main bar of the application, click on the button of your client name, e.g. "John Doe".
- Continue by clicking the “Change Password” button.
- Continue with the displayed form and fill in the original password.
- Enter a new password in the next line and confirm it by entering it repeatedly in the "New password (verification)" field.
- Finish by pressing the “Save” button.
Forgotten password
You can request to create a new password in two ways:
- From the application login screen
- By generating from the system, by the administrator of the Building log, see procedure above